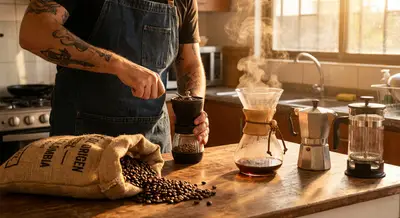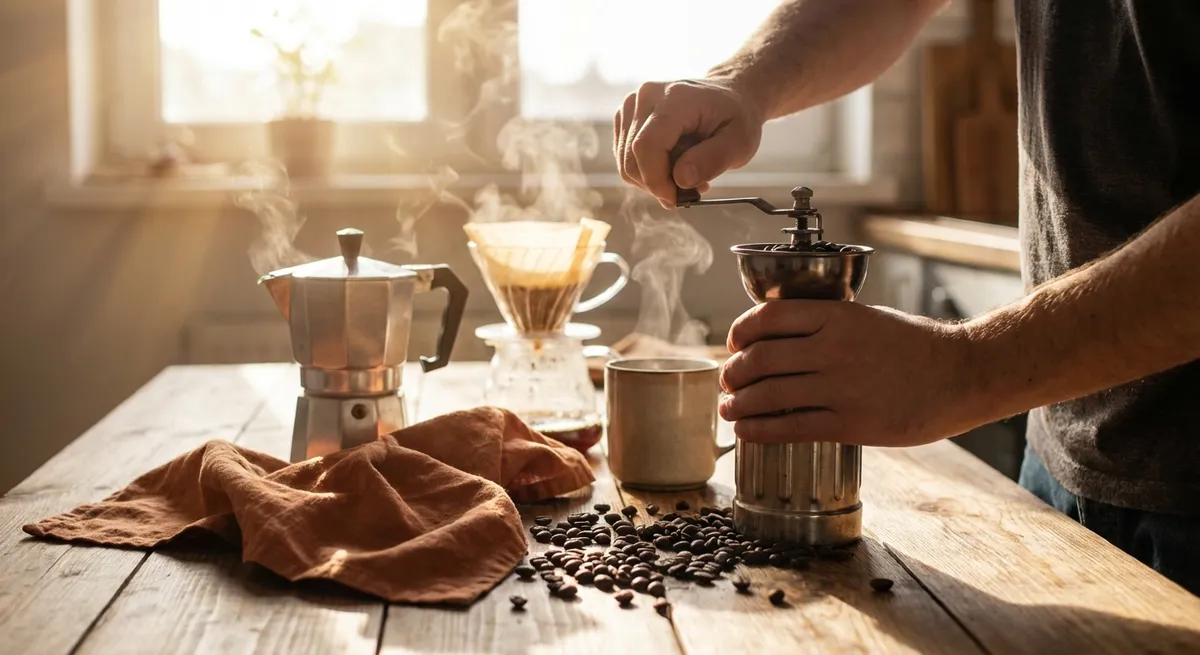
There’s something quietly electric about the moment before a brew: kettle steaming, grinder humming, that first bloom of aroma rising from freshly ground beans. At RoastEden, we live for that pause between potential and first sip. This guide is your map to brewing methods that feel like rituals, not routines—helping you choose the right beans, the right tools, and the right technique to match the cup you actually love to drink.
Matching Brew Method to the Cup You Crave
Before talking gear or grams, start with a simpler question: What do you want your coffee to taste like? Different brewing methods highlight very different sides of the same bean.
If you love nuance—floral, fruity, tea-like cups—you’ll likely gravitate toward pour-over brewers like the Hario V60 or Kalita Wave. Their paper filters and controlled flow reveal clarity and layered acidity.
Prefer a deep, rich, almost dessert-like cup? French press and AeroPress (with a metal filter) lean fuller-bodied, with more oils and texture. These methods emphasize chocolate, nuts, and caramel tones.
Craving intensity closer to espresso without the machine? The stovetop Moka pot pulls a bold, concentrated brew that shines with robust, darker roasts or classic Italian profiles.
When you think about brew method, think of it as a volume knob for specific flavors:
- Pour-over: clarity, brightness, aroma detail
- French press: body, richness, lingering finish
- AeroPress: versatility, sweetness, low bitterness
- Moka pot: punchy, strong, milk-friendly intensity
Choosing how you brew is really choosing which side of the bean you want to bring forward.
Bean Selection: How Origin, Process & Roast Shape Your Cup
Brewing method and bean choice work together like duet partners. Once you know your preferred brew style, you can choose beans that sing in that context.
Understanding origin in plain language
You don’t need to memorize every growing region, but a few broad patterns help:
- East Africa (Ethiopia, Kenya, Rwanda):
Often bright, fruity, floral. Think berries, citrus, jasmine, bergamot. Beautiful in pour-over and lighter AeroPress recipes.
- Latin America (Colombia, Guatemala, Costa Rica, Brazil):
Balanced and approachable. Notes of nuts, cocoa, caramel, mild fruit. Great all-rounders—pour-over, drip, French press, Moka pot.
- Asia-Pacific (Sumatra, Papua New Guinea, parts of Indonesia):
Earthy, spicy, sometimes herbal or smoky, with big body. Shine in French press and Moka pot, and as darker roasts.
Processing: washed vs natural vs honey
- Washed process: Clean, bright, and clear flavors. Stars in pour-over where clarity is key.
- Natural (dry) process: Fruit-forward and sometimes wild, heavier body. Fun in AeroPress and French press.
- Honey / pulped natural: In-between style—sweet, rounded, often silky. Versatile across most brewers.
Roast level and brew pairing
- Light roast: Higher acidity, complex aromatics, origin character. Wonderful in pour-over and AeroPress.
- Medium roast: Balanced sweetness, softer acidity, broader appeal. Fits almost any brew method.
- Medium-dark to dark roast: More bitterness, smoke, and deeper caramelized sugars. Ideal for French press and Moka pot, and for people adding milk or sugar.
- If you mostly drink black coffee, explore light to medium roasts from a variety of origins.
- If you like milk, cream, or sugar, lean into medium-dark profiles or Brazil/Colombia blends that hold up to additions.
A simple rule:
Pour-Over Rituals: Clean, Bright, and Meditative
Pour-over is where precision meets calm. Think of it as a slow conversation between water and coffee, not a race.
Core gear
- Cone dripper (Hario V60, Kalita Wave, or similar)
- Matching paper filters
- Gooseneck kettle (electric or stovetop)
- Burr grinder
- Digital scale & timer
- Fresh whole beans
A reliable V60-style recipe (1–2 cups)
Weigh & grind:
- 18 g coffee (for ~280–300 g water) - Grind: medium-fine, like table salt
Heat your water:
- Target: ~92–96°C (197–205°F). - No thermometer? Bring to boil, rest 30–45 seconds.
Rinse & prep:
- Place filter in dripper, rinse thoroughly with hot water. - Discard rinse water, add coffee grounds, level them gently.
Bloom (0–45 seconds):
- Start timer. Pour about 2x the coffee weight in water (36 g). - Gently saturate all grounds. - Let it sit 30–45 seconds to release trapped gases.
Main pour (45 seconds–2:15):
- Pour in slow circles, avoiding the paper edges. - Aim to reach 280–300 g total water by around 2:00–2:15.
Drawdown (2:15–3:15):
- Let coffee drip through. - Total brew time should be around 2:45–3:15.
Tasting notes & adjustments
Taste your cup when it cools slightly; flavors are clearer below burning hot.
- If it tastes sour, thin, sharp, grind finer or increase brew time slightly.
- If it tastes bitter, harsh, or flat, grind coarser or shorten brew time.
- Washed Ethiopian or Kenyan coffees for floral, citrus, and berry notes
- Washed Central American coffees for crisp apple, caramel, and nutty sweetness
Pour-over excels with:
French Press Comfort: Deep, Rich, and Textured
French press is like a cozy sweater of a brew: simple to use and incredibly forgiving.
Core gear
- French press (traditional glass or insulated stainless steel)
- Burr grinder
- Kettle
- Digital scale & timer
A balanced French press recipe
Weigh & grind:
- 30 g coffee to 500 g water (about a 1:16–1:17 ratio) - Grind: coarse, like sea salt or bread crumbs
Heat your water:
- ~92–96°C (197–205°F), or off-boil with 30 seconds rest.
Combine & bloom (0–30 seconds):
- Add coffee to the press. - Pour about 60–80 g of water, saturating grounds. - Stir gently, wait 30 seconds.
Fill & steep (0:30–4:00):
- Pour remaining water to 500 g total. - Place the lid on top (don’t plunge yet). - Let steep about 4 minutes.
Break crust & skim (4:00–4:30):
- Remove lid, gently stir the top crust. - Skim off floating foam and oils with a spoon for a cleaner cup (optional but recommended).
Plunge & pour (4:30–5:00):
- Place lid back on, plunge slowly and steadily. - Decant all the coffee into a carafe or cups immediately to avoid over-extraction.
Tasting notes & best beans
French press highlights:
- Cocoa, dark chocolate, roasted nuts
- Caramel, toffee, and baking spices
- Heavy body and a lingering finish
- Medium to medium-dark roasts from Brazil, Colombia, or Sumatra
- Blends labeled “breakfast,” “house,” or “classic” that emphasize body and sweetness
Choose:
If your French press cup tastes muddy, coarsen the grind and skim more carefully before plunging.
AeroPress Play: Sweet, Fast, and Incredibly Flexible
The AeroPress is like a pocket science lab for coffee. It can brew something close to a filter coffee, a concentrated shot for milk drinks, or even a pseudo-cold brew—all with one compact tube.
Core gear
- AeroPress (original or AeroPress Go)
- Paper filters (or a reusable metal filter)
- Burr grinder
- Kettle
- Scale & timer (recommended but not mandatory)
Simple “classic style” AeroPress recipe
Weigh & grind:
- 15 g coffee to ~220 g water - Grind: medium-fine (a bit finer than pour-over)
Set up:
- Place filter in cap, rinse with hot water. - Assemble AeroPress on a sturdy mug, add coffee.
Add water & stir (0–20 seconds):
- Start timer. Pour water to 220 g (up to top of the chamber). - Stir gently 10–12 times.
Steep (0:20–1:00):
- Insert plunger just enough to create a seal to prevent dripping. - Let sit until 1:00.
Press (1:00–1:30):
- Press slowly over 20–30 seconds until you hear a light hiss.
Inverted method (for more body & control)
- Flip the AeroPress so the plunger is at the bottom, chamber on top.
- Add grounds, then water, stir, and steep 1:30–2:00.
- Attach cap with filter, flip onto your mug, and press.
Flavor & bean ideas
The AeroPress tends to emphasize:
- Sweetness, round body, and reduced bitterness
- Versatility with both light and darker roasts
- Light-to-medium Ethiopian or Colombian coffees for a sweet, syrupy cup
- Medium-dark blends if you want a strong base for adding milk or making a “long black” style drink
Use:
Moka Pot Intensity: Stovetop Strength Without the Espresso Machine
A Moka pot is the classic Italian stovetop brewer that delivers a bold, concentrated cup—perfect when you want something espresso-like without the full machine investment.
Core gear
- Moka pot (Bialetti and similar brands)
- Burr grinder
- Stove or induction-compatible Moka pot
- Fresh water
A balanced Moka pot routine
Preheat water:
- Heat water in a kettle first. This minimizes the time coffee spends on heat, reducing bitterness.
Prepare the base:
- Add hot water to the lower chamber up to the safety valve (never above).
Weigh & grind:
- Use about 15–20 g coffee for a 3-cup Moka pot (adjust by size). - Grind: fine, but coarser than espresso—like fine sand.
Fill the basket:
- Loosely fill the filter basket to the top, level with your finger. - Do not tamp; just smooth the surface.
Assemble & brew:
- Carefully screw the top chamber on (use a towel to avoid burns). - Place on medium-low heat. Keep the lid open so you can watch the flow.
Watch the stream:
- Coffee will start to emerge and flow in a steady stream. - When the stream turns lighter and sputtery, remove from heat. - Close the lid and cool the base under cold water for a few seconds to stop extraction (optional but helpful).
Tasting notes & best beans
Moka pot brews:
- Intense, concentrated coffee
- Pronounced roast flavors, cocoa, and dark sugar
- Slight bitterness if overheated, but satisfying with milk
- Medium-dark Italian-style blends
- Brazilian or Colombian blends that mention “espresso” or “stovetop” on the bag
- Preheating the water
- Lowering the stove heat
- Grinding slightly coarser
Choose:
If your Moka pot coffee is overly bitter, try:
Essential Equipment: What Actually Matters
You don’t need a full café on your counter to brew beautifully. A few well-chosen tools unlock more flavor than any gadget overload.
Priorities that make the biggest difference
Burr grinder (manual or electric)
- Uniform grind = more control and fewer bitter or sour pockets. - Even a good hand grinder is a massive upgrade over pre-ground or blade grinders.
Fresh whole beans
- Look for a roast date, ideally within 2–4 weeks. - Store in a cool, dry place in an airtight container. Avoid the fridge or freezer for daily-use beans.
Kettle (ideally with a gooseneck spout)
- Especially important for pour-over and AeroPress for controlled pouring. - Temperature control is a plus, but not mandatory.
Scale & timer
- Eliminates guesswork. - Lets you dial in recipes and repeat good results.
Filters & cleaning tools
- Paper filters for clarity and less sediment. - A soft brush and mild soap to keep gear free of old coffee oils.
If you’re building a setup from scratch, your upgrade path might look like:
1) Grinder
2) Scale
3) Your chosen brewer (V60, French press, AeroPress, or Moka pot)
4) Gooseneck kettle
Tasting Your Coffee Like a Curious Pro
The difference between “good coffee” and “your perfect coffee” is attention. You don’t need a cupping spoon or a score sheet—just a bit of curiosity.
Simple tasting practice
- Smell first: Inhale deeply before sipping. Try to find one familiar smell—chocolate, nut, fruit, spice.
- Sip when cooler: Flavors are easier to distinguish as the cup cools. Take a sip at hot, warm, and almost room temperature.
- Notice three things:
- Do I want this to be sweeter? Try a slightly finer grind or a longer contact time.
- Do I want this to be cleaner/less heavy? Try a paper filter method or a coarser grind.
- Do I want more intensity? Increase dose slightly or reduce brew water.
Acidity: bright and lively or flat and dull?
Body: light and tea-like or heavy and creamy?
Finish: does a flavor linger pleasantly or fade quickly?
Then ask:
Treat every brew as a small experiment, and you’ll build an intuitive sense of what to adjust—no spreadsheet needed.
Conclusion
Coffee brewing methods are less about “right vs wrong” and more about choosing a ritual that fits your taste and your mornings. Pour-over gives you control and clarity, French press offers depth and comfort, AeroPress invites playful experimentation, and the Moka pot delivers bold intensity without an espresso machine.
Start with the cup you want to drink, then pair it with the brew method, beans, and simple gear that elevate that style. Over time, you’ll build your own constellation of recipes—a favorite V60 for Sunday slow mornings, a French press for sharing, an AeroPress for travel, and a Moka pot for those bold, milk-ready moments.
Most of all, let the process be enjoyable. The best brewing method is the one that makes you excited to get out of bed for that first, fragrant pour.
Sources
- [National Coffee Association (NCA) – Brewing Essentials](https://www.ncausa.org/About-Coffee/How-to-Brew-Coffee) - Clear, foundational guidance on grind size, water temperature, and basic brewing principles for multiple methods
- [Specialty Coffee Association (SCA) – Brewing Guidelines](https://sca.coffee/research/protocols-best-practices) - Professional brewing standards, including recommended ratios and water quality considerations
- [Barista Hustle – Coffee Brewing & Extraction Guides](https://www.baristahustle.com/blog/) - In-depth, technique-focused articles and experiments on extraction, grind size, and brew methods
- [Hario – V60 Coffee Brewing Guide](https://www.hario-asia.com/pages/how-to-brew-v60) - Manufacturer’s instructions and recommendations specifically for V60-style pour-over
- [Bialetti – Moka Pot Brewing Instructions](https://bialetti.com/pages/how-to-use-a-moka-pot) - Official guidance on correct preparation and usage of Moka pots for consistent, safe stovetop brewing
Key Takeaway
The most important thing to remember from this article is that this information can change how you think about Brewing Methods.