The best coffee isn’t just brewed—it’s built through small, intentional choices. From the grinder on your counter to the water in your kettle, your gear quietly shapes every sip. At RoastEden, we’re not chasing perfection for its own sake; we’re chasing that quiet moment when you take a first sip and think, “Oh. That’s it.”
This guide walks you through a practical, gear-focused path to better coffee at home—grounded in coffee culture, informed by brewing science, and fueled by a love for great beans.
Start with the Cup You Crave
Before we talk gear, get clear on your favorite experience, not just a brewing method.
Ask yourself:
- Do you prefer coffee that’s rich and chocolatey, or bright and fruity?
- Do you like heavy, syrupy texture or something light and tea-like?
- Is speed in the morning more important than ritual?
- Do you usually drink coffee with milk, or black?
From there:
- If you love bold, rich coffee (often with milk), you’ll likely gravitate to gear for espresso or pressure-style brewers (like moka pots, some pod systems, or manual espresso devices).
- If you love clean, aromatic cups, gear for pour-over or automatic drip will shine.
- If you love comfort and body, immersion gear like a French press, AeroPress, or Clever dripper is a sweet spot.
Lock in your “dream cup” first. The right gear is simply the set of tools that make that cup repeatable.
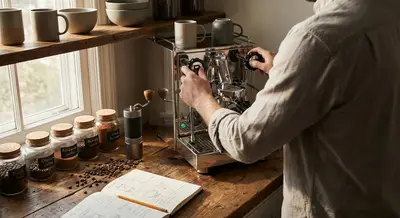
Grinder First: The Foundation of Every Brew
If coffee gear had a “most valuable player,” it wouldn’t be the fancy machine—it would be the grinder.
Why Grinding Matters
Coffee’s flavor lives in aromatic compounds that vanish quickly once beans are ground. A good grinder:
- Keeps particle sizes consistent (for even extraction and balanced taste)
- Lets you adjust grind size for different brew methods
- Unlocks more sweetness and clarity from the same beans
Blade vs Burr: What Actually Changes in Your Cup
- Blade grinder (the whirring propeller style):
- Chops instead of grinds → uneven particles
- Often leads to over-extracted bitterness + under-extracted sourness in the same cup
- Okay for emergencies, but limiting if you care about flavor
- Burr grinder:
- Crushes beans between two burrs for consistent size
- Lets you dial in settings for espresso, pour-over, immersion, etc.
- Delivers more sweetness, less harshness, and a more “professional” taste
Manual vs Electric: Matching Gear to Your Routine
- Manual burr grinders:
- Great for 1–2 cups, travel, and pour-over/immersion
- Quiet, compact, and often more affordable for high-quality burrs
- Best if you enjoy the ritual and don’t mind 30–60 seconds of hand-grinding
- Electric burr grinders:
- Best for larger households or espresso
- Faster and more convenient
- Mid-range models are often a huge step up from cheap blade grinders
Simple rule:
If you upgrade only one piece of gear, start with a burr grinder. Even a modest brewer paired with a good grinder can produce café-level coffee.
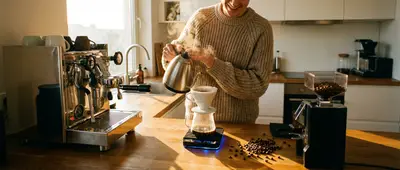
Water, Kettles & Temperature: The Silent Flavor Shapers
You can have amazing beans and a dialed-in grinder, but if your water is off, your coffee will be too.
Water Quality: Don’t Skip This
Coffee is ~98% water. If your tap water tastes flat, metallic, or chlorinated, your coffee will echo that.
- Use filtered water (simple pitcher filters can be enough)
- Avoid pure distilled water (it lacks minerals that help extract flavor)
- If you want to get nerdy, aim for water similar to SCA (Specialty Coffee Association) guidelines: moderate hardness and balanced minerals
The Right Kettle for the Right Job
- Standard electric kettle:
- Works for immersion brewers (French press, AeroPress)
- You control timing but not pouring precision
- Gooseneck kettle (manual pour):
- Essential for pour-over control
- Lets you pour slowly and evenly, avoiding channeling (water rushing through parts of the bed and under-extracting others)
- Available in stovetop and electric variable-temp versions
If you’re into pour-over, a gooseneck kettle is the one upgrade that changes the brewing experience overnight.
Temperature: What to Actually Use
- General sweet spot: 90–96°C (195–205°F)
- For lighter roasts: lean hotter (93–96°C / 200–205°F) to extract delicate acids and sweetness
- For darker roasts: lean cooler (90–93°C / 195–200°F) to reduce bitterness
No temp control?
Boil water, wait 30–45 seconds, then brew.
Brew Method Deep-Dive: Picking Gear by Flavor
Let’s pair common flavor preferences with specific gear and techniques.
Immersion Brewing (French Press, AeroPress, Clever)
Flavor profile:
Rounded, full-bodied, often with more perceived sweetness and a heavier mouthfeel.
Great for:
Chocolatey, nutty, and caramel-forward coffees; cozy morning mugs; drinkers who like cream or milk.
Recommended gear:
- French press (classic, rich, oils preserved)
- AeroPress (versatile, quick, travel-friendly)
- Clever dripper (immersion + paper filter’s clarity)
Baseline French Press Recipe (Step-by-Step):
Grind: Coarse, like sea salt
Dose: 1:15 ratio → 20 g coffee to 300 g water
3. Bloom: Pour twice the coffee’s weight in hot water (e.g., 40 g), swirl, wait 30 seconds
Fill: Add the rest of the water to 300 g, stir gently
Steep: 4 minutes total contact time
Plunge: Press the filter down slowly
Serve: If you’re not drinking it all immediately, decant into another vessel to avoid over-extraction
Tasting checkpoints:
- If it tastes muddy or too heavy, try a slightly finer grind but shorter brew time or use a metal filter with care.
- If it tastes thin or sour, grind finer or extend the brew time to 5 minutes.
Pour-Over (V60, Kalita, Origami, Chemex)
Flavor profile:
Clean, layered, and aromatic with clarity that showcases origin character.
Great for:
Fruity, floral, or complex beans; sipping black; tasting regional differences.
Recommended gear:
- A cone or flat-bottom dripper (V60, Kalita Wave, Origami, etc.)
- Gooseneck kettle
- Digital scale that measures grams
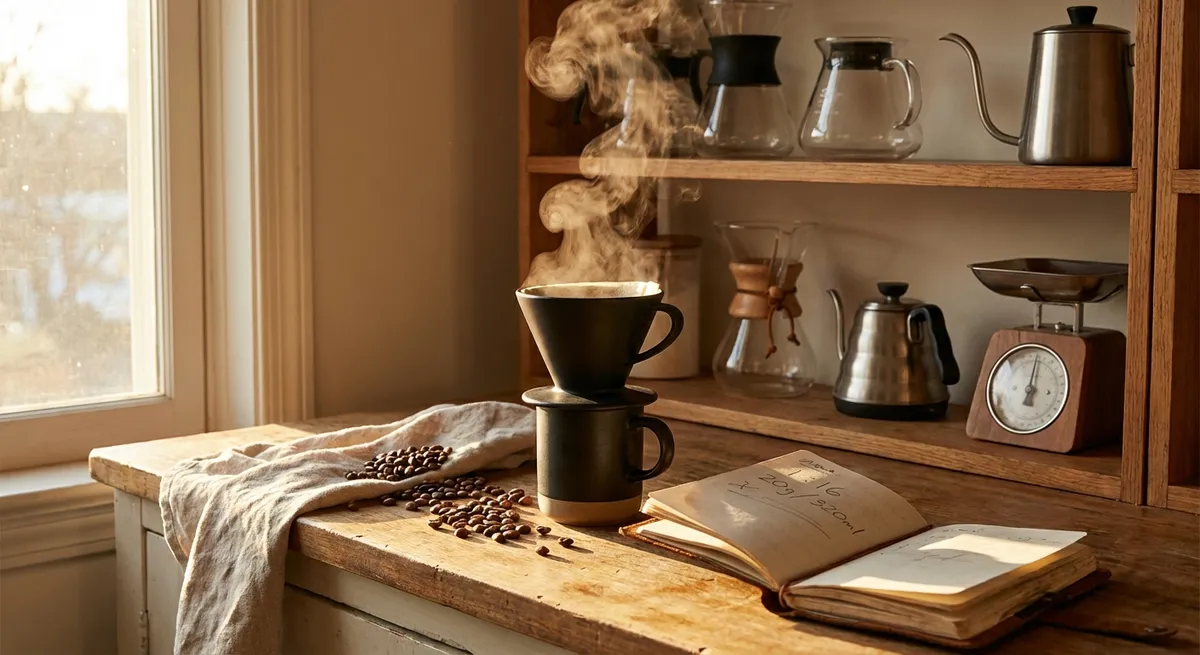
Baseline V60 Recipe (Step-by-Step):
Grind: Medium-fine, like table salt
Dose: 1:16 ratio → 20 g coffee to 320 g water
Rinse: Rinse the filter with hot water to remove paper taste and preheat the dripper
Bloom (0:00–0:30):
- Add 40 g water (2× coffee weight) - Swirl or stir gently to saturate all grounds
Pour 1 (0:30–1:15):
- Slowly pour to reach 160 g total in concentric circles, avoiding the very edge
Pour 2 (1:15–2:00):
- Pour to 260 g
Final Pour (2:00–2:30):
- Pour to 320 g
Drawdown: Let the coffee fully drip; total brew time: 2:45–3:15
Tasting checkpoints:
- Sour, sharp, or thin → grind finer, pour slightly slower, or increase dose slightly.
- Bitter, hollow, or dry → grind coarser or reduce brew time by pouring more quickly in fewer stages.
Espresso & Concentrated Brews (Machine & Manual)
Espresso requires the tightest tolerances in your gear.
Flavor profile:
Intense, concentrated, creamy; good for milk drinks and flavor-forward shots.
Essentials for home espresso:
- A dedicated espresso grinder (with fine, precise steps or stepless adjustment)
- A machine or manual device capable of consistent pressure and stable temperature
- Tamper, scale, and ideally a distribution tool or simple WDT (using a thin needle to break up clumps)
If a traditional espresso machine is out of budget, explore:
- Lever or manual espresso makers (portable, smaller footprint)
- Moka pot: Not true espresso, but an excellent, rich compromise for lattes and cappuccino-style drinks at home.
Matching Beans to Your Gear & Taste
Gear is half the story; beans are the other half. Think of bean selection as curating a playlist for your brewing setup.
Roast Level and Brew Method
- Light roasts:
- High acidity, complex aromatics
- Shine in pour-over and filter methods
- Often showcase origin: citrus, berry, florals
- Medium roasts:
- Balanced acidity and sweetness
- Flexible: good in pour-over, drip, immersion, and espresso
- Notes like caramel, stone fruit, chocolate
- Dark roasts:
- Lower acidity, more roast-driven notes: dark chocolate, smoke, spice
- Pair well with French press, moka pot, and milk drinks
- Easier to extract but can turn bitter if brewed too hot or too long
Single Origin vs Blend
- Single origin:
- From one region, farm, or co-op
- Great for exploring terroir via pour-over or black filter coffee
- Kenya might bring currant and citrus; Ethiopia may show jasmine, bergamot, blueberry
- Blend:
- Designed for balance and consistency
- Excellent for espresso and milk-based drinks
- Roasters often blend for chocolatey, nutty, and caramel notes that still pop through milk
Freshness & Storage
- Look for a roast date (not just “best by”).
- Coffee is often at its peak from 3–14 days after roasting for filter, slightly longer for espresso.
- Store beans:
- In a cool, dark place
- In an airtight container
- Avoid fridge/freezer cycling unless you’re doing serious long-term storage and know the protocol (moisture and condensation can be an issue).
Building a Tasting Practice: How to “Read” Your Cup
You don’t need a sommelier’s vocabulary to taste coffee thoughtfully. A simple, repeatable approach helps you tune your gear and brewing habits.
A Simple Tasting Framework
When you sip, pay attention to four main elements:
Aroma – What do you smell before sipping? Nuts, cocoa, fruit, florals, spices?
Acidity – Is it bright like citrus, gentle like stone fruit, or very mellow?
Body – Thin like tea, medium like juice, or heavy like cream?
Finish – What lingers? Sweetness, dryness, bitterness, a particular flavor?
Practical Tasting Notes Exercise
Pick a new coffee and brew it two ways with your gear (for example, French press vs pour-over, or AeroPress vs drip):
- Brew both at similar ratios (e.g., 1:15–1:16).
- Pour into similar mugs so presentation doesn’t distract you.
- Taste side-by-side while warm, then again as they cool.
Jot quick descriptors:
- Aroma: “cocoa, dried fruit” - Acidity: “low, like dark cherry” - Body: “heavy, creamy” - Finish: “sweet, slight baker’s chocolate bitterness”
Over time, these notes help you notice how gear shapes flavor—and which combinations (beans + method + grinder setting) consistently hit your personal sweet spot.
A Minimalist Gear Roadmap (Without the Clutter)
You don’t need a full café in your kitchen to drink like a pro. Focus on a coherent set that matches your style.
For the Curious Beginner
- Burr grinder (manual or entry-level electric)
- Immersion brewer (French press or AeroPress)
- Standard electric kettle
- Simple digital scale
This setup already lets you experiment with time, grind size, and ratios—the real levers of flavor.
For the Pour-Over Enthusiast
- Consistent burr grinder (manual or mid-tier electric)
- Pour-over dripper (V60, Kalita Wave, Origami, etc.)
- Gooseneck kettle (ideally variable temperature)
- Digital scale + timer
This is a high-reward setup for exploring single origins and tasting subtle differences in beans and recipes.
For the Aspiring Home Barista
- Dedicated espresso-capable burr grinder
- Espresso machine or well-designed manual espresso device
- Tamper, distribution tool, milk pitcher
- Optional: separate pour-over setup for exploring origins
Think of it as a long-term hobby: start with what fits your budget today and upgrade strategically as your palate (and patience) evolves.
Conclusion
Your coffee ritual isn’t about owning every gadget; it’s about choosing the few pieces of gear that consistently bring you closer to the cup you love. A thoughtful grinder, intentional water, and a brewing method that aligns with your taste can transform “just another morning” into something quietly special.
As you experiment, treat each cup as feedback—not failure. Take a sip, adjust one variable (grind, time, temperature, ratio), and try again. Before long, you won’t just be making coffee; you’ll be crafting a ritual that feels unmistakably yours—and your gear will be the steady, reliable toolkit that brings that ritual to life day after day.
Sources
- [Specialty Coffee Association – Brewing Handbook](https://sca.coffee/research/protocols-best-practices) - Provides professional standards for water quality, brewing ratios, and extraction guidelines used across the specialty coffee industry.
- [Barista Hustle – The Grinder’s Guide](https://www.baristahustle.com/blog/the-grinders-guide/) - In-depth exploration of burr design, grind size, and their impact on extraction and flavor.
- [National Coffee Association (NCA) – How to Brew Coffee](https://www.ncausa.org/about-coffee/how-to-brew-coffee) - Offers accessible, research-based fundamentals on brewing methods, water temperature, and storage.
- [European Coffee Brewing Centre](https://ecbc.info/) - Details certification standards for coffee brewers and water quality, explaining what makes home drip machines perform at a high level.
- [James Hoffmann – Water for Coffee (YouTube)](https://www.youtube.com/watch?v=QI9xiFPrE2s) - A clear, practical breakdown of how water composition affects coffee flavor and how home brewers can make simple improvements.
Key Takeaway
The most important thing to remember from this article is that this information can change how you think about Coffee Gear.