Espresso looks simple in the cup, but behind that tiny shot is a world of culture, science, and ritual. Whether you’re pulling your first shot or chasing that café-level sweetness at home, understanding the foundations of espresso will transform both your coffee and your daily routine. Let’s walk through coffee culture, gear, technique, and tasting—step by step.
Espresso in Coffee Culture: More Than Just a Caffeine Hit
Espresso sits at the heart of modern coffee culture. In Italy, it’s a quick, standing ritual at the bar; in Australia, it’s the backbone of flat whites and long blacks; in the U.S. and beyond, it powers everything from macchiatos to iced lattes. Wherever you are, espresso is the concentrated expression of coffee: intense, aromatic, and layered with flavor.
What makes espresso special isn’t just its strength, but its texture: that syrupy body and the tawny crema on top. Because it’s brewed under high pressure with a very short contact time, espresso reveals both the best and worst in a coffee bean. Great beans and careful technique produce sweetness, balance, and complexity. Poor beans or sloppy brewing deliver sour, bitter, or hollow flavors.
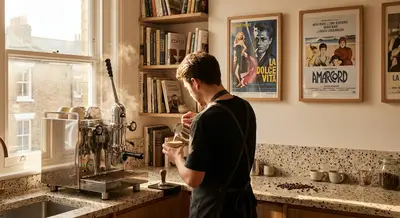
Espresso culture is also about ritual. The grind adjustment in the morning, the gentle tamp, the watchful eye on the shot time—these small actions become a daily meditation. As you learn to read your espresso (and your palate), you’ll start to tune your process the way a musician tunes an instrument.
Choosing Beans for Espresso: Roast, Origin, and Freshness
Your espresso is only as good as the beans you use. Equipment and skill matter, but beans are the foundation.
Roast Level
- Medium to medium-dark roast is most common for espresso, offering balance between sweetness, body, and bitterness.
- Light roast espresso is possible and often fruity and complex, but it’s more challenging to dial in and can easily taste sour if under-extracted.
- Dark roast can yield rich, chocolatey shots but may lean smoky or bitter and have less nuance.
Aim to start with a medium or medium-dark roast labeled for espresso if you’re newer to dialing in.
Origin and Blends
- Blends are common for espresso because roasters combine beans to balance sweetness, acidity, and body. Classic blends often pair a chocolatey Brazil with a fruity or nutty Central American origin.
- Single origins can be stunning, showcasing distinctive flavors:
- Ethiopia – floral, berry, citrus
- Brazil – nutty, chocolatey, low acidity
- Colombia – caramel, red fruit, balanced acidity
- Sumatra/Indonesia – earthy, spicy, heavy body
If you love milk drinks (lattes, cappuccinos), look for tasting notes like chocolate, caramel, nuts—these stand up beautifully in milk. For straight espresso, feel free to explore brighter, fruitier profiles.
Freshness and Storage
- Freshly roasted (about 4–21 days off roast) is often ideal for espresso. Too fresh (1–3 days) and the shot can be gassy and erratic; too old and it tastes flat.
- Store beans in an airtight, opaque container at room temperature—away from light, heat, and moisture.
- Grind just before brewing. Pre-ground coffee goes stale quickly and makes dialing in much harder.
Essential Espresso Gear: What You Really Need
You don’t need a café’s worth of gear to make excellent espresso at home, but a few key tools make a huge difference.
Espresso Machine
Look for:
- Stable temperature and pressure – Machines with good temperature control (PID controllers) and a quality pump are easier to dial in.
- Portafilter size – 58 mm is the café standard; it gives more flexibility with baskets and tools.
- Steam performance – If you love milk drinks, pay attention to steam power and control.
Types:
- Entry-level machines (pressurized baskets, thermoblock boilers) can make decent espresso but limit how far you can refine.
- Prosumer machines (E61 group heads, dual boilers, PID) give café-like control and consistency.
- Manual/lever machines offer tactile control and beautiful design, but require more skill and practice.
Grinder
The grinder is at least as important as the machine.
- Choose a burr grinder designed for espresso (conical or flat burrs; avoid blade grinders).
- Look for micrometric or stepless adjustment for fine control; espresso is extremely sensitive to small grind changes.
- Consistent particle size helps prevent channeling and uneven extraction.
Core Accessories
- Tamper that fits your basket snugly (usually 58 mm) for an even, level tamp.
- Scale with 0.1 g accuracy and a timer to measure dose and yield.
- Distribution tool or WDT (Weiss Distribution Technique) tool to break up clumps and even out the coffee bed.
- Milk pitcher (12–20 oz) with a good spout if you steam milk or practice latte art.
These tools aren’t about looking “pro”—they’re about repeatability. Once you can repeat your inputs, it’s much easier to refine your espresso.
Step-by-Step: Pulling a Classic Espresso Shot
Let’s use a common recipe as a starting point: 18 g in, 36 g out, in 25–30 seconds. From there, you’ll adjust based on taste and bean.
1. Warm Up and Prep
- Turn on your espresso machine and let it fully warm up (often 20–30 minutes for best stability).
- Run a quick blank shot (no coffee) to warm the portafilter and group head.
- Wipe the basket dry—water in the basket can affect extraction.
2. Dose and Grind
- Set your grinder to a fine espresso setting (finer than sand; it should clump slightly).
- Weigh your empty portafilter and then grind until you reach your target dose (e.g., 18.0 g of coffee).
- Gently tap or settle the portafilter to level the mound of grounds.
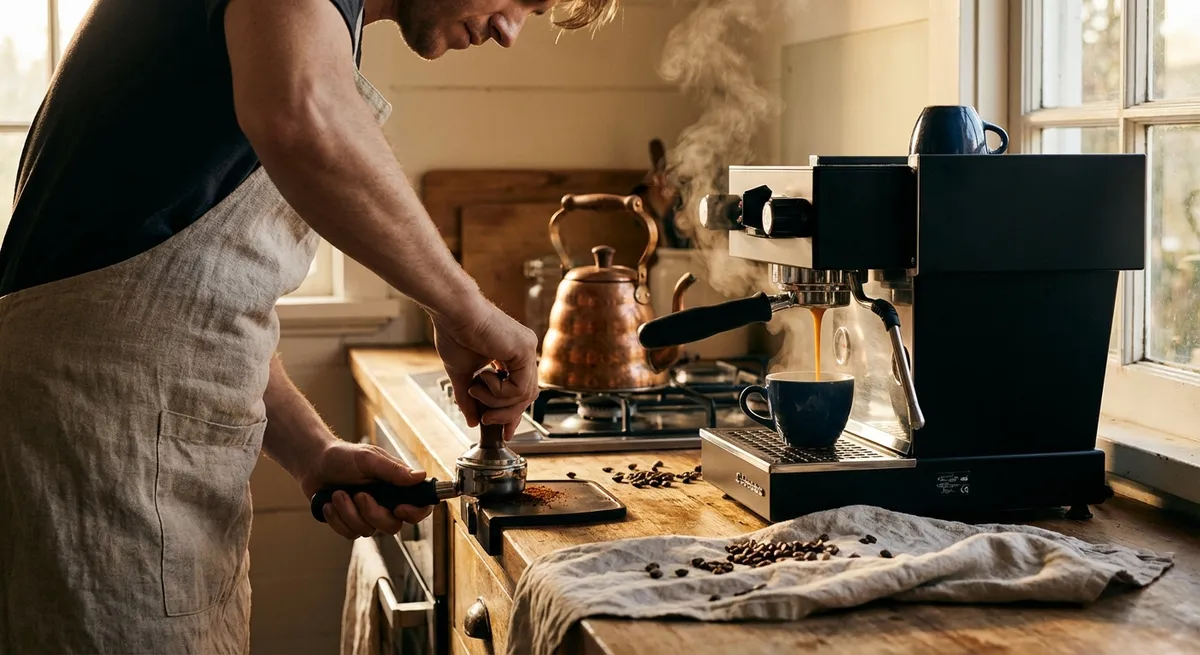
3. Distribute and Tamp
- Use a distribution tool or WDT to break up clumps and spread grounds evenly.
- Hold the tamper level and press down with firm, consistent pressure (around 15–30 lbs, but consistency matters more than exact force).
- Check that the tamp is level—a tilted puck can cause channeling and uneven extraction.
- Wipe any loose grounds off the rim of the portafilter.
4. Lock In and Brew
- Lock the portafilter into the group head firmly but not aggressively.
- Place your cup or shot glass on a scale under the spouts.
- Start the shot and timer at the same time.
Watch for:
- First drops around 5–8 seconds (pre-infusion may vary this). - A steady, honey-like flow, not too fast or too drippy. 5. Stop the shot when the scale reads your target yield (e.g., 36 g), ideally between 25–30 seconds from the start of the shot.
5. Evaluate and Adjust
Taste your espresso:
- Too sour, sharp, or thin?
- Finer grind
- Slightly longer shot time
- Slightly higher dose (e.g., 18.5–19 g)
- Too bitter, harsh, or dry?
- Coarser grind
- Shorter shot time
- Slightly lower dose (e.g., 17–17.5 g)
Likely under-extracted. Try:
Likely over-extracted. Try:
Make one change at a time, re-taste, and take brief notes. Dialing in is a process of small, intentional tweaks.
Tasting Espresso: Reading Flavors Like a Pro
Learning to taste is just as important as learning to brew. Espresso is intense, so give your palate a moment to adjust.
How to Taste
- Smell first – Aromas often reveal chocolate, nuts, fruit, florals, or spices.
Take a small sip, let it coat your tongue, and note:
- Sweetness – Caramel, chocolate, honey, ripe fruit - Acidity – Brightness: citrusy, apple-like, berry-like - Bitterness – Cocoa, dark chocolate, or harsh and medicinal? - Body – Thin, medium, or syrupy and creamy
Notice the finish – Do pleasant flavors linger, or does a harsh aftertaste stick around?
Common Espresso Flavor Profiles
- Chocolatey & Nutty
Origins: Brazil, many blends
Notes: Cocoa, almond, hazelnut, caramel
Great for: Lattes, cappuccinos, approachable straight shots
- Fruity & Bright
Origins: Ethiopia, Kenya, some Central Americans
Notes: Berries, citrus, stone fruit, florals
Great for: Straight espresso or Americanos if you enjoy acidity
- Spicy & Earthy
Origins: Sumatra, other Indonesians
Notes: Baking spices, tobacco, earthy, herbal
Great for: Bold espresso, people who like “old school” profiles
Use a simple scale for yourself (e.g., 1–5 for sweetness, acidity, bitterness, body), and jot down a few words. Over time, this helps you understand what you like and how to chase it.
Milk Steaming Basics for Lattes and Cappuccinos
If milk drinks are your thing, properly steamed milk turns good espresso into café-level comfort.
Milk Choice
- Whole milk: Best texture and sweetness for latte art; rich and forgiving.
- 2%: Lighter body but still workable.
- Alternative milks: Look for “barista” versions of oat, soy, or almond—they’re formulated to steam better and stay stable.
Steaming Step-by-Step
- Fill your pitcher to just below the spout base (about 6–8 oz for a small latte).
- Purge the steam wand briefly to remove condensation.
- Submerge the tip just below the surface, near the side of the pitcher.
Turn on steam fully and “stretch” the milk:
- Lower the pitcher slightly so you hear a gentle tss-tss sound, introducing air for the first 3–5 seconds. 5. Once the milk has expanded slightly, raise the pitcher so the tip is just under the surface and create a whirlpool motion. 6. Stop steaming when the pitcher is too hot to comfortably hold for more than a second or two (around 55–65°C / 130–150°F). 7. Wipe and purge the steam wand immediately. 8. Swirl and tap the pitcher to remove bubbles. The milk should be glossy and paint-like.
Aim for:
- Cappuccino: Slightly more foam, distinct but fine microfoam layer.
- Latte/Flat white: Silky, thinner microfoam that integrates fully with the espresso.
Simple Recipes: Dialed-In Espresso Drinks
Here are a few go-to recipes to try once your espresso is consistent.
Straight Espresso (Double)
- Dose: 18 g coffee
- Yield: 36–40 g espresso
- Time: 25–30 seconds
- Target flavor: Sweet, balanced, with pleasant acidity and gentle bitterness.
Cappuccino
- Espresso: 1 double shot (18 in / ~36 out)
- Milk: 4–5 oz steamed with a moderate foam layer
- Technique: Pour milk into the center, then raise the pitcher slightly to create a thick, velvety top.
Latte
- Espresso: 1 double shot
- Milk: 8–10 oz steamed, with thin microfoam
- Technique: Start with a higher pour to mix, then lower to the surface to create a simple heart or tulip if you’re practicing latte art.
Iced Americano
- Espresso: 1–2 double shots
- Water: 4–8 oz cold water over ice
- Technique: Fill glass with ice and water first, then pour espresso on top for a layered, clean, refreshing drink.
Beginner-Friendly Equipment Recommendations
You don’t need exact brands here, but look for these features at different levels:
Budget-Conscious Starter
- Machine: Single-boiler or thermoblock machine with at least a 51–54 mm portafilter, ideally non-pressurized baskets available.
- Grinder: Entry-level espresso-capable burr grinder with fine adjustment (often home-oriented brands with stepless or micro-step dials).
Enthusiast Setup
- Machine: Dual boiler or heat-exchanger machine with PID control and a 58 mm group head.
- Grinder: Dedicated espresso grinder with stepless adjustment and consistent burrs (flat or conical).
Universal Essentials
- 58 mm tamper (or size matched to your basket)
- 0.1 g scale with timer
- WDT tool or fine needle distribution tool
- Pitcher (12–20 oz) and microfiber cloth for steaming and wiping
Whatever you choose, prioritize a good grinder and fresh beans. Even a modest machine can produce delightful espresso with those two pieces in place.
Conclusion
Espresso is both craft and ritual—a daily opportunity to slow down, tune your senses, and create something expressive in a tiny cup. By understanding bean selection, dialing in your grind and recipe, and paying attention to taste, you can turn home espresso from guesswork into a repeatable, satisfying routine.
Start with a simple recipe, make one change at a time, and let your palate be your guide. The joy of espresso isn’t in chasing perfection; it’s in noticing how each small adjustment brings you closer to your ideal shot—and sharing those discoveries with others who love coffee just as much.
Sources
- [Specialty Coffee Association – Brewing Fundamentals](https://sca.coffee/education/brewing) – Overview of specialty coffee brewing principles, including extraction basics and variables.
- [Counter Culture Coffee – Espresso Guides](https://counterculturecoffee.com/pages/espresso) – Practical espresso recipes, dialing-in tips, and equipment guidance from a major specialty roaster.
- [La Marzocco Home – Espresso 101](https://home.lamarzoccousa.com/espresso-101/) – Technical yet accessible explanations of espresso mechanics, pressure, and workflow.
- [Barista Hustle – What is Espresso?](https://www.baristahustle.com/blog/what-is-espresso/) – Deep dive into espresso definition, brewing parameters, and extraction theory.
- [National Coffee Association (NCA) – Coffee Preparation](https://www.ncausa.org/about-coffee/how-to-brew-coffee) – General brewing information and best practices, including grind size and freshness.
Key Takeaway
The most important thing to remember from this article is that this information can change how you think about Espresso Guides.