Home coffee roasting sits at the sweet spot between craft, curiosity, and ritual. It turns your morning cup from “pretty good” into something deeply personal—because you controlled everything from the raw bean to the final sip. If you’ve ever wondered why some coffees taste vibrant and complex while others fall flat, learning to roast at home is one of the most rewarding paths you can take as a coffee lover.
This guide will walk you through bean selection, roasting methods, step-by-step processes, and brewing techniques, all with practical, experience-based tips to help you get started confidently.
Why Roast at Home? The Culture Behind the Craft
Home roasting is more than a hobby; it’s a way of joining a centuries-old coffee culture that values freshness, craftsmanship, and connection to origin.
Freshness is the biggest advantage. Green coffee beans can stay stable for many months when stored properly, but once roasted, flavor compounds start to break down within days to weeks. By roasting at home, you can enjoy your coffee at its peak—usually between 1–14 days after roasting—rather than drinking something that’s been aging on a shelf.
Roasting also connects you to the story behind the beans. You’ll start to notice origin labels—Ethiopia, Colombia, Kenya, Brazil—not just as names, but as flavor personalities. As you dial in your roasts, you’ll taste differences driven by altitude, soil, processing method, and variety. Suddenly “fruity and floral” or “chocolatey and nutty” aren’t just words on a bag; they become real in the cup.
There’s also a satisfying DIY culture around home roasting. Enthusiasts share roast profiles, experiment with unconventional equipment, and trade beans from microlots and small farms. It’s an extension of the same energy that drives home bakers, craft beer brewers, and food fermenters: a desire to understand what we consume and to shape it with our own hands.
Choosing the Right Green Beans
The foundation of great coffee is great green beans. Even the most skilled roast can’t “fix” low-quality or defective coffee. When you’re starting out, look for:
- Single-origin vs. blends
- Single-origin beans (from one country, region, or farm) showcase distinct flavor profiles—ideal for learning how origin affects taste.
- Blends can offer balance and consistency, but they also add variables. Begin with a good single-origin to simplify your learning curve.
- Washed vs. natural vs. honey processed
- Washed (wet-processed): Cleaner, brighter acidity; flavors like citrus, florals, and tea-like notes. Great for beginners.
- Natural (dry-processed): Often fruit-forward, jammy, or winey; can be intense but a bit more challenging to roast evenly.
- Honey / pulped natural: A middle ground—sweet, often with syrupy body.
Recommended origins for beginners
- Brazil: Typically chocolatey, nutty, low acidity, forgiving in roast and brew. - Colombia: Balanced, with clear sweetness and moderate acidity—excellent for learning. - Guatemala: Cocoa, baking spices, and structured acidity; great for both filter and espresso. - Ethiopia (washed): Floral and citrusy; stunning when dialed in, but the aromatic complexity can magnify roast errors—start with Brazilian or Colombian, then move here.
Bean quality and grading
Look for specialty-grade beans from reputable suppliers. They’re usually graded by size and defect count. Specialty coffee generally has fewer defects, which means cleaner flavors and more predictable roasting.
How much to buy
Start with 1–2 pounds each of two different origins. This gives you enough volume to experiment with multiple roast levels per bean without overwhelming you with variety.
Essential Home Roasting Equipment Options
You don’t need a commercial roaster to get great coffee at home. Your setup can be as simple or as specialized as you like, but each option has trade-offs in control, smoke, and consistency.
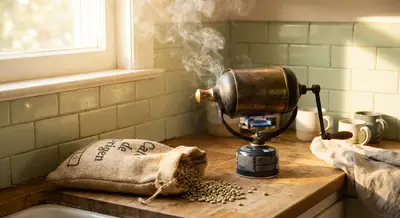
1. Dedicated Home Coffee Roaster
These machines are built for the job:
- Pros:
- Designed airflow and heat control
- Consistent results and repeatable profiles
- Often include timers, temps, and cooling cycles
- Cons:
- Higher upfront cost
- Some have limited batch size
Popular examples include fluid-bed (air) roasters and small drum roasters. They’re ideal if you’re serious about roasting and want easier, repeatable control.
2. Popcorn Popper (Air Popper)
The classic budget entry point:
- Pros:
- Very affordable
- Quick roast times (often 5–10 minutes)
- Simple to use
- Cons:
- Limited batch size (often 60–100 g)
- Minimal built-in control over temperature
- Not all models are safe or effective for coffee
If you go this route, choose a popper that heats from the side and has good airflow. Avoid models with exposed heating elements that beans can touch directly.
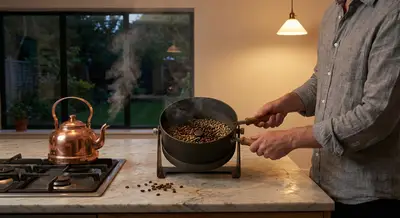
3. Pan Roasting (Stovetop)
Using a thick pan or cast iron skillet:
- Pros:
- Almost zero specialized equipment
- Good for understanding the sensory aspects (sound, smell, color)
- Cons:
- Harder to get even roasts
- High smoke and chaff
- Demanding: you must stir constantly
Pan roasting is more about the experience and learning than perfect consistency, but it can still produce tasty results once you gain a feel for it.
4. Home Oven Roasting
Using a baking tray in your oven:
- Pros:
- Uses existing equipment
- Can roast larger batches than a popcorn popper
- Cons:
- Uneven heat distribution
- Slower to respond to adjustments
- More variable results
If you have a convection oven, you’ll generally get better airflow and more consistent roasts.
Helpful Extras
- Digital scale: For measuring beans and roast yield.
- Timer: To track roast progression.
- Colander or mesh sieve: For cooling beans quickly.
- Notebook or app: To log roast time, method, origin, and tasting notes.
- Ventilation solution: Open windows, a fan near the stove, or range hood—roasting produces smoke and chaff.
Understanding Roast Levels and Flavor
Roast level has a profound impact on flavor, body, and perceived acidity. There’s no “best” level—just what suits your beans and your preferences.
Light Roast
Visual: Light brown, no visible oil on surface
Flavor:
- Brighter acidity, more origin character
- Fruity, floral, or tea-like notes are more pronounced
Best for: Filter brewing (pour-over, Aeropress, drip), explorers of nuance
Medium Roast
Visual: Medium brown, usually no oil
Flavor:
- Balance of sweetness, acidity, and body
- More caramel, chocolate, and nutty notes
Best for: Versatile—works well for both filter and espresso
Dark Roast
Visual: Dark brown to nearly black; oil often visible
Flavor:
- Roast flavors dominate: bittersweet, smoky, sometimes spicy
- Lower perceived acidity, heavier body
Best for: Espresso, those who prefer bold, intense flavors
When starting, aim for light-medium to medium roasts. This range helps you taste origin while keeping roast management more forgiving than very light profiles.
Step-by-Step: Your First Home Roast (Air Popper Example)
This step-by-step assumes a basic air popcorn popper, but the sensory cues—sound, smell, color—apply to most methods.
What You’ll Need
- 70–90 g green coffee beans (check your popper’s safe capacity)
- Air popcorn popper
- Large metal bowl or colander
- Timer
- Wooden spoon (for cooling)
- Well-ventilated space
Step 1: Preheat (Optional but Helpful)
Run the empty popper for about 30 seconds to 1 minute. This reduces the time to first crack and leads to more predictable roasts.
Step 2: Measure and Load the Beans
Measure your beans by weight (e.g., 80 g), then pour them into the chamber. Start your timer right as you begin roasting.
Step 3: Watch and Smell the Progress
You’ll notice a progression:
Early phase (0–2 minutes):
- Beans change from green to pale yellow - Grassy smell
Drying and Maillard phase (2–4 minutes, times vary):
- Yellow to light brown - Smell shifts toward bready or toasty
Step 4: Listen for First Crack
First crack is a crucial marker:
- You’ll hear distinct popping sounds—like popcorn, but lighter and less violent.
- This is when the bean structure fractures and internal pressure is released.
- Light roasts often end shortly after first crack; medium roasts continue somewhat further.
- Wait until first crack begins and continues for ~30–60 seconds.
- When the majority of beans have cracked, you can choose to stop.
For a light-medium roast:
Step 5: Decide When to End the Roast
- Light roast: End near the tail end of first crack.
- Medium roast: Continue 30–90 seconds after first crack subsides, watching color closely.
- Avoid second crack initially: Second crack is a softer, more rapid crackling. As a beginner, stay just ahead of that to avoid tipping into dark roast accidentally.
Step 6: Cool the Beans Quickly
Turn off the popper and immediately pour beans into a metal bowl or colander. Stir or shake them vigorously to cool. Rapid cooling locks in your roast level and prevents “baking” (a dull, flat taste from extended residual heat).
Step 7: Rest the Beans (Degassing)
Freshly roasted beans release CO₂:
- For filter coffee: Rest 12–48 hours.
- For espresso: Rest 3–7 days.
Store the beans in an airtight container, ideally with a one-way valve, away from light and heat.
Step 8: Taste, Take Notes, Adjust
Brew a cup after 24 hours and again at different rest times. Record:
- Roast date and method
- Roast duration and estimated level (light, medium, etc.)
- Tasting notes: sweetness, acidity, body, specific flavor descriptors
Use these notes to adjust next time: longer or shorter roast, lighter or darker, different bean, and so on.
Developing Your Palate: Tasting Notes and Coffee Language
Tasting coffee is like learning a new vocabulary. The more you practice, the more specific your descriptors become.
Start with the Big Four
Sweetness: Does it taste sugary (like honey, caramel, brown sugar) or more dry and bitter?
2. Acidity: Not “sourness” in a bad sense, but brightness—like citrus, green apple, or berry.
Body: How it feels in your mouth—light and tea-like, medium and smooth, or heavy and syrupy?
Finish: What flavors linger after swallowing—clean and crisp, or long and cocoa-like?
Simple Tasting Exercise
- Brew two different home-roasted coffees at the same strength.
- Taste side by side, focusing on one attribute at a time (e.g., acidity, then body).
- Use general words first: fruity, nutty, chocolatey, floral, spicy.
- Only then try to get specific: lemon vs. orange, almond vs. hazelnut, milk chocolate vs. dark chocolate.
Over time, you’ll begin to see how roast level and origin interact—like how a light roast Ethiopia dramatizes citrus and florals, while a medium roast Brazil brings out chocolate and nuts.
Brewing Techniques That Highlight Your Roast
Roasting is half the story; brewing is the other half. Different methods can amplify or soften the traits you’ve created in your roast.
1. Pour-Over (e.g., V60, Kalita, Origami)
- Best for: Highlighting clarity, acidity, and complex aromatics.
- Grind: Medium-fine, like sand slightly finer than typical drip.
- Ratio: ~1:15–1:17 (1 g coffee per 15–17 g water).
- Tip: Use freshly boiled water (let it rest 30–60 seconds) around 92–96°C (198–205°F).
Pour-over accentuates differences between roast levels and origins, making it a powerful “tasting lens” for your experiments.
2. French Press
- Best for: Full body, rich mouthfeel, and chocolatey notes.
- Grind: Coarse, like sea salt.
- Ratio: ~1:15–1:16.
- Brew time: 4 minutes steep, then plunge.
French press can soften sharp acidity and round out lighter roasts, making them taste fuller and sweeter.
3. Espresso
- Best for: Concentrated flavor, crema, and milk drinks.
- Grind: Very fine, dialed in specifically for your machine.
- Ratio: Common starting point is 1:2 (e.g., 18 g in, ~36 g out in 25–35 seconds).
Espresso magnifies everything—good or bad. For your own roasts, a medium roast is usually the safest starting point, with lighter roasts requiring extra skill and precision.
4. AeroPress
- Best for: Flexible experimentation: you can mimic espresso-like strength or clean filter cups.
- Grind: Anywhere from medium-fine to fine depending on the recipe.
- Brew time: Typically 1–3 minutes, often with a gentle plunge.
AeroPress is an excellent learning tool for tasting how grind size, water temp, and steep time affect your roasted coffee.
Practical Recommendations for Getting Started
Start simple with gear:
- A good-quality burr grinder - Your chosen roasting method (air popper, pan, or entry-level roaster) - One filter method (e.g., V60 or French press)
Pick two contrasting coffees:
- Example: Washed Colombia + Natural Ethiopia Roast both to similar levels and compare to understand how origin and processing affect flavor.
Change one variable at a time:
- For example: same bean and method, but shorten roast time for the next batch to get a lighter profile. - Or: same roast, different brew method.
Log everything:
- Date, time, bean, method, roast duration, perceived roast level, tasting notes. - Over time, you’ll see patterns that help you “design” your coffee experiences.
Prioritize safety and ventilation:
- Always roast in a well-ventilated area. - Never leave roasting equipment unattended. - Be mindful of hot surfaces and chaff, which is very lightweight and can be messy.
Conclusion
Home coffee roasting turns your daily ritual into an ongoing experiment in flavor, craft, and culture. You’ll start to understand not just what you like, but why you like it—how a slightly longer roast, a washed vs. natural process, or a different brew method changes the story in your cup.
You don’t need expensive gear or professional training to begin. You only need curiosity, patience, and a willingness to taste, tweak, and taste again. With each batch, you’ll get closer to that deeply personal, “this is my coffee” experience that defines the heart of home roasting.
Sources
- [Specialty Coffee Association – Home Roasting Basics](https://sca.coffee/resource-library/home-roasting) - Overview of home roasting fundamentals and quality considerations
- [National Coffee Association (NCA) – Coffee Roasts Guide](https://www.ncausa.org/About-Coffee/Coffee-Roasts-Guide) - Clear descriptions of roast levels and their impact on flavor
- [Perfect Daily Grind – What Is Green Coffee?](https://perfectdailygrind.com/2020/11/what-is-green-coffee-and-how-is-it-processed/) - Detailed look at green coffee and processing methods
- [Barista Institute by Paulig – Coffee Flavor Wheel & Tasting](https://www.baristainstitute.com/coffee-tasting/coffee-tasting-and-flavour-wheel) - Practical guidance on developing tasting skills and using flavor descriptors
- [Home-Barista – Beginner’s Guide to Home Roasting](https://www.home-barista.com/home-roasting/beginners-guide-to-home-roasting-coffee-t18895.html) - Community-driven insights and step-by-step advice from experienced home roasters
Key Takeaway
The most important thing to remember from this article is that this information can change how you think about Home Roasting.