Coffee tastes different when you’ve roasted it yourself. It’s not just flavor; it’s the smell that fills your kitchen, the crackle of the beans, the first sip of a cup that exists only because you made it from start to finish. Home roasting isn’t about perfection—it’s about intimacy with the bean, the brew, and your own taste. Let’s build that journey together.
Why Roast at Home? Flavor, Ritual, and Culture
Home roasting sits at the crossroads of craft and ritual. When you roast your own coffee, you’re not just saving money or chasing freshness—you’re stepping into the same tradition that small roasters and classic cafés built their reputations on.
Freshly roasted beans reach a peak of flavor within days. That means your best cup often happens at home, not in a café, if you’re roasting in small batches. You’ll notice more origin character: a washed Ethiopian might glow with citrus and florals, while a natural Brazilian feels rich, nutty, and chocolatey. Roasting lets you dial those traits up or down.
There’s also cultural connection. As you learn which regions and processing methods you enjoy, you start to taste the geography and labor behind each bag: high-altitude farms, meticulous sorting, careful drying. You begin to understand why cafés obsess over roast curves and why baristas talk about “developing sweetness.”
Most importantly, home roasting rewires your relationship with your morning cup. Instead of “just coffee,” you now taste choices: roast level, bean origin, brew method, and your own hands in the process.
Choosing Green Beans: Origins, Processing, and Freshness
Great roasting starts with thoughtful green bean selection. You cannot “fix” bad green coffee with a good roast—so put your energy into buying well.
What to look for in green beans
- Freshness of green coffee
Green coffee ages more slowly than roasted, but it does age. Look for crop-year information or harvest dates where possible. Ideally, you’re roasting beans from the most recent harvest (usually within 6–12 months).
- Origin and altitude
- Ethiopia, Kenya, Rwanda: Often bright, fruity, floral; higher-acidity profiles.
- Colombia, Guatemala, Costa Rica: Balanced, often sweet, with citrus, caramel, or cocoa.
- Brazil: Nutty, chocolatey, lower acidity—great as a “comfort” base for blends.
Higher altitude beans (often 1,500m+) generally have denser structure and can handle lighter roasts with more complex acidity.
- Processing method
- Washed (wet-processed): Cleaner, brighter profiles; flavors like citrus, stone fruit, florals.
- Natural (dry-processed): Fruit-forward, jammy, sometimes winey or funky; can add body and sweetness.
- Honey / pulped natural: Middle ground—sweet and round, with moderate fruit and clarity.
- Grade and defect level
Specialty-grade beans are rigorously sorted, with few defects. Fewer defects = cleaner cup, less bitterness, more clarity.
Starter suggestions by flavor preference
- Love bright, tea-like coffees? Try a washed Ethiopian or Kenyan.
- Want classic “chocolate and nuts”? Go for Brazilian or Colombian.
- Crave sweet and fruity? Try a natural Ethiopian or natural Central American.
- Prefer low-acid comfort cups? Look for Brazilian, Sumatran, or blended lots marketed as “espresso” or “comfort” profiles.
Buying from reputable specialty importers or roasters who sell green beans gives you traceability, tasting notes, and roast recommendations—a huge advantage when you’re learning.
Understanding Roast Levels and Tasting Notes
Thinking like a roaster means tasting with intention. Roast level profoundly shapes what ends up in your cup.
Light, medium, and dark—what they really mean
- Light roast
- Typically stopped soon after the end of first crack.
- Flavor: vibrant, higher-acidity, more origin character; lots of fruit and floral notes, sometimes tea-like.
- Texture: lighter body, crisp finish.
- Great for: pour-over, filter coffee, cupping; exploring origin nuances.
- Medium roast
- Roasted a bit longer after first crack, often before or just at the very start of second crack.
- Flavor: sweetness and acidity more balanced, with caramel, chocolate, and baking spice notes.
- Texture: fuller body, rounded flavor, crowd-pleasing.
- Great for: most brewing methods, including drip, pour-over, AeroPress, and espresso.
- Dark roast
- Pushed well into or past second crack. Oils may appear on the surface.
- Flavor: more roast-driven—smoky, bitter-sweet chocolate, charcoal, sometimes ashy if overdone.
- Texture: heavier body, lower acidity, intense.
- Great for: fans of bold, traditional “espresso” or French press profiles.
How to taste your roasts like a pro
When you brew coffee from your fresh roast, approach it like a mini cupping session:
- Smell the dry grounds: Note aromas (chocolate, nuts, berries, flowers, spices, etc.).
- Taste at different temperatures: Flavors shift as the cup cools. Acidity and sweetness become more apparent warm-to-lukewarm.
Use a simple structure:
- Acidity: Bright, juicy, flat, sharp, pleasant, harsh? - Sweetness: Brown sugar, honey, caramel, fruit, or none? - Body: Thin, silky, creamy, heavy? - Finish: Clean, lingering, bitter, drying, syrupy?
Write down just three words per roast (e.g., “citrusy, sweet, light” or “bitter, smoky, thin”). Over a few batches, those notes will help you connect roast degree to cup profile and guide your adjustments.
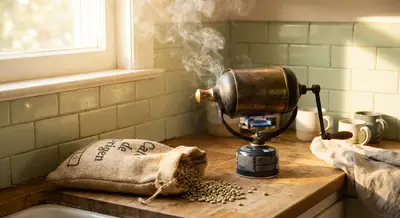
Essential Home Roasting Gear: From Minimalist to Dedicated
You can roast on equipment you probably already own or invest in gear built for the job. The right choice depends on your budget, batch size, and how deep you want to go.
Entry-level options
- Stovetop popcorn popper (whirly-pop style)
- Pros: Cheap, simple, tactile; lets you see and hear the roast.
- Cons: Manual stirring, uneven heat, lots of smoke; requires practice.
- Best for: Small batches (60–120g), beginners who love hands-on craft.
- Oven roasting (least recommended)
- Pros: Requires no new gear.
- Cons: Poor airflow, uneven roast, tough to hear crack; harder to control.
- Best for: Experimenting once or twice, not for consistent results.
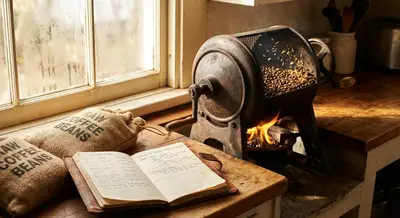
Dedicated home roasters
- Fluid-bed / air roasters (e.g., FreshRoast, Kaffelogic, and similar)
- Pros: Fast, responsive, relatively compact; often with programmable profiles.
- Cons: Smaller batch size; louder (harder to hear cracks).
- Best for: Apartment dwellers, tinkerers, small frequent batches.
- Drum roasters (e.g., Behmor, Hottop, Ikawa Home drum-style units)
- Pros: Closer to commercial roasting style; larger batch sizes; smoother development.
- Cons: Higher cost, bigger footprint, more learning curve.
- Best for: Serious enthusiasts and those roasting for family/friends.
Supporting tools
- Scale: For weighing beans pre- and post-roast (to track weight loss and consistency).
- Timer: To log roast duration and timing of cracks.
- Notebook or app: To track bean origin, charge weight, roast time, crack timings, end temperature (if available), and tasting notes.
- Ventilation solution: Open windows, fan, or range hood. Roasting produces smoke and chaff.
You don’t need everything at once. Start with one method, a notebook, and a scale. Add gear only when you know what’s holding you back.
Step-by-Step: Your First Home Roast (Stovetop Method)
This walkthrough uses a stove-top popcorn popper or heavy pot with a lid. Adjust details based on your stove, pot, and bean density, but the flow is similar for many beginner setups.
Preparation
Measure your beans
- Start with 60–80 grams of green coffee. Smaller batches are easier to control.
Preheat your roasting vessel
- Medium heat for a few minutes. You want it hot enough to get to first crack in about 8–12 minutes, not screaming hot.
Set up your cooling station
- Place a metal colander or mesh strainer in the sink or over a large bowl. Have oven mitts ready.
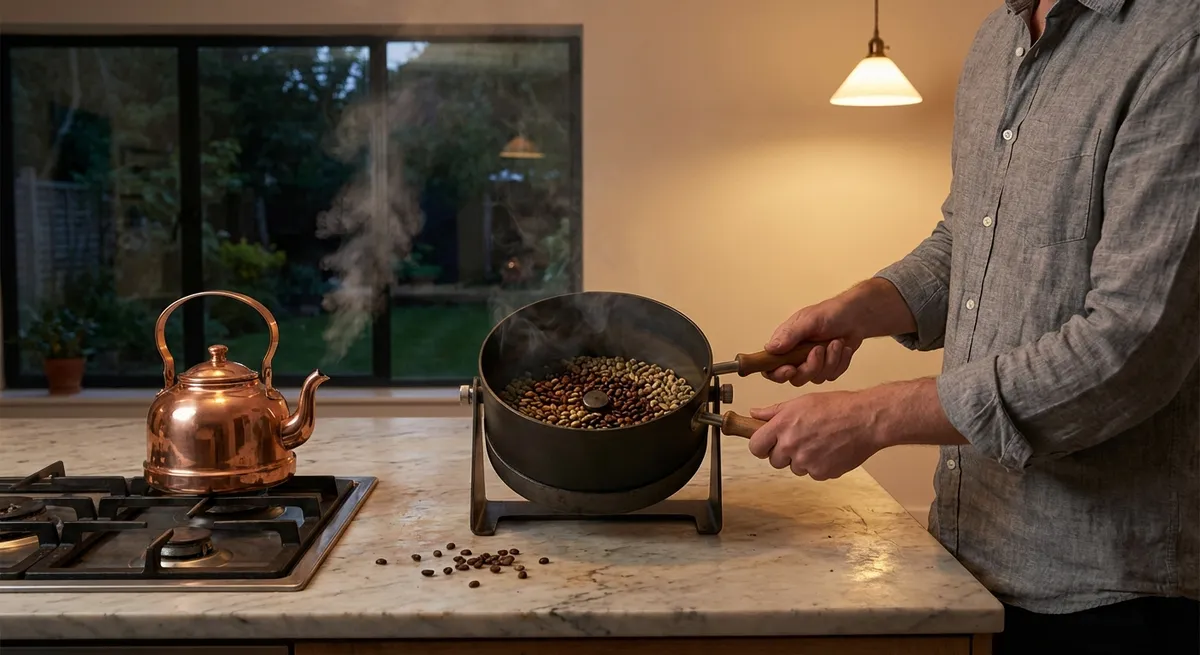
The roast
Charge the beans
- Add green coffee to the preheated vessel and start your timer immediately. - If using a whirly-pop, begin turning the handle steadily. If using a pot, shake it gently every 15–20 seconds (or stir with a heat-proof spoon if safe).
Drying phase (0–5 minutes, approximate)
- Beans go from green to yellow, then light tan. - They’ll smell grassy/hay-like at first, then like baking bread. - Keep the heat consistent—avoid scorching. Gentle, even movement matters.
Approach to first crack (5–10 minutes)
- Color deepens to light brown. Aroma shifts toward toasty, like toasted grain. - Listen closely: first crack sounds like popcorn popping or snapping twigs. This is when moisture is rapidly escaping.
First crack (the key moment)
- Once first crack starts, note the time. Cracking may last 1–3 minutes. - The beans at this stage are entering “light roast.” Flavors will be brighter and more acidic.
Development time (post–first crack)
- Keep the beans moving. Adjust heat slightly down if the roast seems to race. - For a light roast: stop 30–60 seconds after first crack mostly finishes. - For a medium roast: continue 1:30–3:00 minutes past the end of first crack, watching color. - If you keep going, you may hear second crack—a lighter, more rapid ticking sound. This is where dark roasts begin.
End the roast (drop)
- When color looks right and/or you reach your target time, cut the heat and immediately dump the beans into your cooling colander.
Cooling and resting
Cool quickly
- Toss beans in the colander, stir or shake to shed heat and chaff. Aim for room temperature within 2–3 minutes.
Remove chaff
- Gently blow across the beans (ideally outside or over the sink) to remove papery chaff.
Rest the beans (degassing)
- Store in a loosely covered container or a one-way valve bag. - Most coffees taste best after 12–72 hours of rest as CO₂ escapes and flavors settle.
Label
- Note roast date, origin, and any details (time to first crack, end time, estimated roast level).
On your next batch, adjust one variable at a time: maybe extend the time between first crack and the end of roast to boost sweetness, or shorten it for more lively acidity.
Brewing Your Fresh Roast: Methods that Show Off Your Work
Once you’ve roasted, how you brew can either showcase or smother your hard work. Here’s how to pair brew methods with your roast style and what to expect in the cup.
Pour-over (V60, Kalita, Origami, etc.)
Best for highlighting clarity and nuanced flavors.
- Use for: Light to medium roasts, complex single origins.
- Basic starting recipe:
- 15–16 g coffee per 250 g water (1:15–1:16 ratio).
- Water temp: 93–96°C (200–205°F) for lighter roasts, slightly cooler for mediums.
- Grind: Medium-fine, like table salt.
- Expect: Clear acidity, layered flavor, clean finish—ideal for evaluating differences between roasts.
French press
Great for body and comfort, with forgiving extraction.
- Use for: Medium to dark roasts, blends, chocolatey and nutty cups.
- Basic starting recipe:
- 18 g coffee per 300 g water (around 1:16–1:17).
- Water temp: 92–94°C (198–201°F).
- Grind: Coarse, like coarse sea salt.
- Steep ~4 minutes, then press and decant fully.
- Expect: Rich mouthfeel, rounded sweetness, slightly less clarity—great for cozy cups.
AeroPress
Versatile, travel-friendly, and excellent for experimentation.
- Use for: Almost any roast; tweak recipes easily.
- Inverted method starter recipe:
- 14 g coffee, medium-fine grind.
- 220 g water at 90–94°C (194–201°F).
- 30-second bloom, then top up and steep to 1:30, press slowly.
- Expect: Dense, sweet cup that can mimic espresso-like concentration or clean filter coffee, depending on recipe.
Whichever method you choose, brew the same coffee in two different ways if you can. You’ll see how your roast interacts with extraction, body, and aroma—even without changing the bean.
Tuning Your Roast Through the Cup: A Feedback Loop
To grow as a home roaster, use your brewing results as a feedback loop.
If the coffee tastes:
- Sour, sharp, or “underdeveloped”
- Roast may be too light for that bean, or development time after first crack is too short.
- Try: Extending the post–first crack phase by 30–60 seconds, or slightly slowing the ramp from yellow to first crack.
- Flat, dull, or “roasty without character”
- You may be roasting too dark for that origin or baking the coffee (too long at low heat).
- Try: Ending the roast sooner, increasing energy early so you don’t stall, or choosing a bean better suited to darker roasts.
- Bitter and ashy
- Likely over-roasted (too deep into second crack) or scorching from excessive heat.
- Try: Lowering peak heat, ending the roast earlier, or using a gentler heat ramp.
- Thin and watery, even at good strength
- Could be underdeveloped or brewed too coarsely.
- First, fix the brew (slightly finer grind, longer extraction). If still thin, add a bit more post–first crack development next roast.
Take simple notes: “Batch 3 – washed Colombia – medium roast – sweet, balanced, slightly flat. Next time: stop 30 seconds earlier.” Over time, these micro-adjustments become instinctive.
Conclusion
Home roasting is a slow-burn obsession: part science, part sensory training, and part quiet ritual. Each batch tells you something—about the bean, the heat, the time, and your own preferences. With a bag of green coffee, a modest setup, and curiosity, you can turn your kitchen into a tiny roastery and your morning routine into an exploration of flavor.
Roast, rest, brew, taste, adjust. That cycle is the heart of the craft. And every time you share a cup of your own roast with someone else, you’re also sharing that journey—from raw green seeds to a cup that feels completely, unmistakably yours.
Sources
- [Specialty Coffee Association: Introduction to Coffee](https://sca.coffee/research/coffee-standards) - Overview of coffee standards, including green and roasted coffee quality frameworks.
- [Perfect Daily Grind – A Beginner’s Guide to Home Coffee Roasting](https://perfectdailygrind.com/2020/11/a-beginners-guide-to-home-coffee-roasting/) - Practical insights into home roasting methods, pros and cons, and beginner tips.
- [National Coffee Association (NCA): Roast Guide](https://www.ncausa.org/About-Coffee/Coffee-Roasts-Guide) - Clear explanations of roast levels and their impact on flavor.
- [Counter Culture Coffee: Brewing Basics](https://counterculturecoffee.com/learn/brewing) - Detailed brew guides and recipes for various methods to help dial in fresh roasts.
- [Coffee Quality Institute](https://www.coffeeinstitute.org/our-work/coffee-quality) - Background on coffee quality, grading, and the role of defects and processing in flavor.
Key Takeaway
The most important thing to remember from this article is that this information can change how you think about Home Roasting.