There’s a special kind of magic in taking raw, grassy-smelling green coffee beans and transforming them into a fragrant, crackling, deep-brown roast in your own kitchen. Home roasting doesn’t just save money or give you fresher coffee—it pulls you into the heart of coffee culture, where flavor, craft, and curiosity collide. Whether you’re a pour-over purist, an espresso experimenter, or just coffee-curious, learning to roast at home can change the way you taste every cup.
The Heart of Coffee Culture: Why Roast at Home?
Coffee culture has moved far beyond “caffeinated beverage” into a world of origin stories, processing methods, and flavor exploration. Home roasting is a natural next step for coffee lovers who find themselves asking, “What else is possible in my cup?”
Roasting at home deepens your connection to the coffee supply chain. You stop seeing beans as a commodity and start seeing them as agricultural products with terroir, harvest cycles, and unique flavor potential. You’ll learn why a washed Ethiopian coffee tastes so different from a natural-processed Brazilian, and how roast level can highlight or mute those characteristics.
It also opens a doorway into experimentation. Cafe menus give you finished products; home roasting gives you control. You can chase bright, tea-like acidity one week and syrupy chocolate notes the next, tweaking roast profiles and brew methods to fine-tune your ideal cup. Over time, you’ll develop your own “house style” and a palate that can recognize subtle differences in origin, process, and roast level.
Most importantly, it’s fun. The first time you hear first crack (when beans audibly pop like popcorn), smell the evolving aromas, and then brew a cup from your own roast, you’ll understand why home roasters rarely go back to store-bought beans.
Understanding Green Coffee: Origins, Processing, and Bean Selection
Before you roast, you need to choose green beans wisely—this is your flavor foundation.
1. Origin and flavor profiles
While there are countless exceptions, some broad patterns help beginners:
- Ethiopia – Often floral, tea-like, with citrus or berry notes. Great for light roasts and pour-overs.
- Kenya – Bright acidity, blackcurrant, grapefruit, complex sweetness. Excellent for those who love vivid, punchy flavors.
- Colombia – Balanced, versatile, with caramel, nut, and stone fruit notes. Great all-rounder for many brew methods.
- Brazil – Lower acidity, chocolate, nuts, and creamy body. Ideal for espresso and darker roasts.
- Central America (Guatemala, Costa Rica, Honduras, etc.) – Often offer a balance of acidity and sweetness, with cocoa, citrus, or nutty profiles.
Start with a few different origins in small quantities and keep notes—your palate will tell you what to buy again.
2. Processing method
How the coffee cherry is processed shapes flavor as much as origin:
- Washed (Wet-processed) – Cleaner, brighter, more transparent flavors. Great if you love clarity and acidity.
- Natural (Dry-processed) – Fruit-forward, sometimes jammy or winey, with heavier body. Can be wild and fun, but also more fermenty if you’re not into that.
- Honey / Pulped natural – A middle ground; smooth sweetness with moderate fruit and acidity.
As a home roaster, you can use processing to guide roast style: naturals often shine as slightly lighter to medium roasts, while washed coffees handle a wider range.
3. Bean density and screen size
- High-altitude beans are often denser and can tolerate more heat early in the roast without scorching.
- Larger beans (e.g., some peaberries aside) can roast more slowly and may need slight profile adjustments.
For beginners, most reputable green coffee retailers note whether a coffee is “beginner-friendly” and describe roast recommendations (light/medium/dark). Lean on those notes early; as you gain experience, you’ll interpret green beans more confidently.
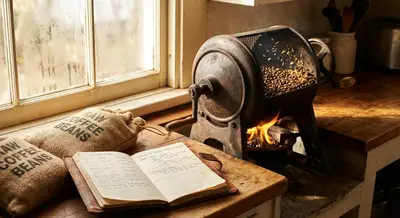
Home Roasting Methods: Choosing the Right Setup
You can roast coffee with anything from a pan on your stove to a dedicated fluid-bed roaster. Each method has trade-offs in control, smoke, and learning curve.
1. Easiest entry: Popcorn popper (hot-air type)
- Pros: Inexpensive, simple, fast.
- Cons: Smaller batch sizes, less precise control, not all models are safe for coffee use long-term.
Look for a popcorn popper that blows hot air from the bottom and has side vents. Roast outside or under very good ventilation—smoke builds fast.
2. Skillet or pan roasting
- Pros: Uses equipment you already own, tactile and hands-on.
- Cons: Uneven roasts, more manual work, easier to scorch or underdevelop beans.
A heavy cast-iron or stainless pan over a burner works, but this method is more art than science. Great for understanding roasting “feel,” less ideal for consistency.
3. Oven roasting
- Pros: Simple, batch size can be larger.
- Cons: Uneven heating, slower response to changes, more difficult to hear cracks.
Use a perforated tray for better air circulation, and be ready for lingering aromas in your kitchen.
4. Dedicated home coffee roaster
- Pros: Designed for the job, better control of temperature, time, and airflow; more repeatable results.
- Cons: Higher upfront cost, learning curve for profiles.
Popular beginner-friendly styles:
- Fluid bed roasters (similar to large popcorn poppers): fast, bright roasts; great for lighter, clean profiles.
- Drum roasters: more traditional; often better for medium to darker roasts, heavier body, and nuanced development.
If you plan to roast regularly, a small dedicated roaster quickly becomes worth the investment for consistency and enjoyment.
Step-by-Step: Your First Simple Home Roast
This walkthrough assumes a hot-air popcorn popper or a basic electric home roaster, but the principles apply across methods.
1. Prep your space and tools
- Good ventilation (outdoors or near a strong exhaust fan).
- Heat-safe gloves or mitts.
- Metal colander or mesh strainer for cooling.
- Kitchen scale (ideally) to measure coffee.
- Timer or smartphone to track time.
- Notebook or app to record your roast: time, sounds, smells, color.
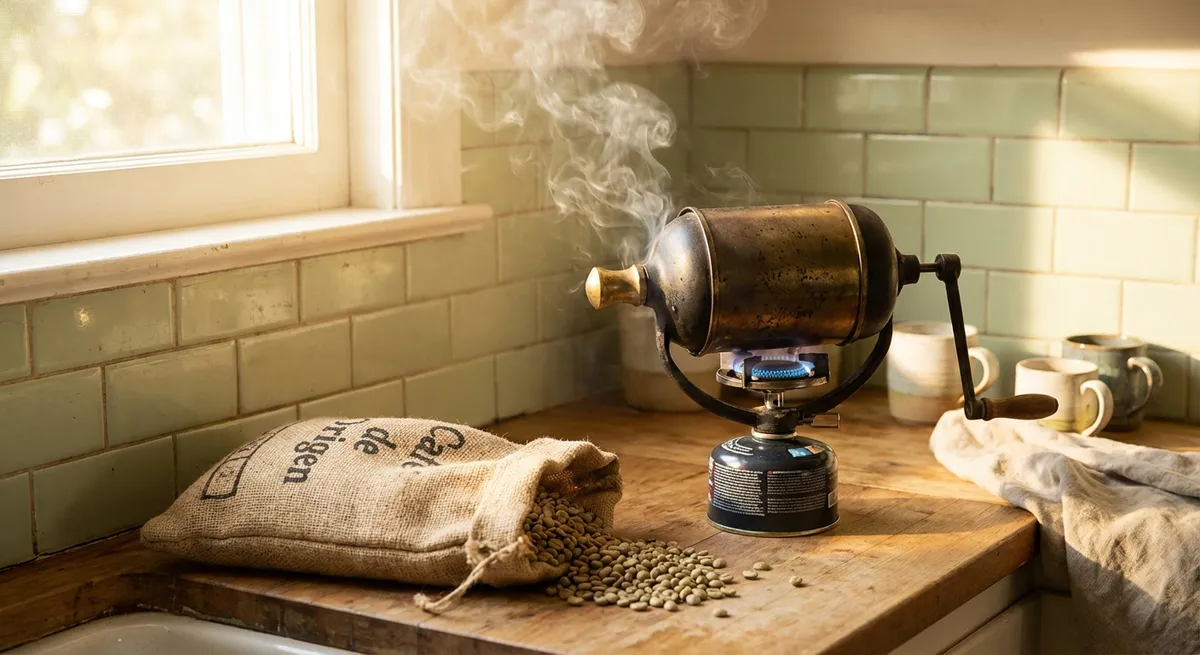
2. Measure your green beans
- Start with 75–100 grams (about 3–4 oz) of green coffee for a small roaster or popcorn popper.
- Beans lose about 12–20% of their weight after roasting due to moisture loss.
Record origin, processing, and target roast level (e.g., “Ethiopia washed, aim for light-medium”).
3. Start the roast
- Turn on your roaster/popcorn popper and add the beans as instructed by the manufacturer (some prefer preheating; others don’t).
- Gently swirl or stir if your method requires it (skillet, certain poppers).
As roasting begins, green beans turn yellow, then light brown, shedding chaff (the thin skin). The smell will shift from grassy to toasty and bread-like.
4. Listen for first crack
- Around 8–10 minutes on many setups (faster in poppers), beans will start to pop distinctly, like gentle popcorn. This is first crack—the point where beans expand and release steam and CO₂.
- A light roast often finishes shortly after first crack starts to slow.
- A medium roast typically ends between the tail end of first crack and just before second crack.
At this stage, use your senses:
- Sight: Beans move from cinnamon/light brown to classic brown.
- Smell: From bready to sweet caramel, then more toasty.
- Sound: Pops intensify, then slow.
5. Decide your target roast level
Approximate visual and sensory markers:
- Light roast
- End near the end of first crack, but before it stops completely.
- Color: Light brown, no surface oil.
- Flavor: Higher acidity, more origin-driven notes (citrus, florals, delicate fruits).
- Medium roast
- End after first crack has mostly finished but before second crack begins.
- Color: Rich brown, still matte surface.
- Flavor: Balanced acidity and sweetness, more caramel and nut tones.
- Medium-dark to dark roast
- Approach or enter second crack, a faster, quieter crackling sound.
- Color: Dark brown with visible oil (especially darker levels).
- Flavor: Lower acidity, more roast-driven flavors like dark chocolate, smoke, and carbon if pushed too far.
For your first roast, aim for a light-medium—just at or shortly after the end of first crack. It tends to showcase origin flavors without being too sharp.
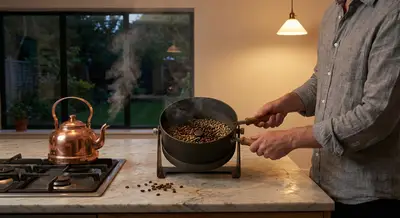
6. Cool the beans quickly
Once you hit your target:
- Immediately dump beans into a metal colander or mesh strainer.
- Stir or toss vigorously to cool them as fast as possible—this stops the roast from progressing further.
- If safe, you can set them in front of a fan to speed cooling.
Rapid cooling preserves brightness and prevents overdevelopment.
7. Rest and degas
Freshly roasted beans release CO₂ for hours to days after roasting:
- Let beans rest in a loosely covered container or one-way-valve bag for 12–24 hours before brewing most methods.
- Espresso often benefits from 3–7 days of rest, depending on the roast.
Taste a sample right away for curiosity, but expect the flavor to stabilize after degassing.
Equipment Recommendations: What to Buy (and When)
You don’t need everything at once. Build your setup gradually around the brew methods you love.
For roasting
- Beginner budget:
- Air popcorn popper (if heat-safe for continuous use): affordable and simple.
- Metal colander/strainer for cooling.
- Serious beginner / intermediate:
- Entry-level dedicated coffee roaster from a reputable brand.
- Basic thermometer or built-in temperature readout.
- Notebook or roasting app.
For brewing
- Grinder:
- Burr grinder is non-negotiable for quality. Blade grinders chop unevenly and compromise flavor.
- Manual burr grinders: great for pour-over, AeroPress, and immersion methods.
- Electric burr grinders: better for daily convenience and espresso.
- Brewers (choose according to your style):
- Pour-over (V60, Kalita Wave, Chemex): clarity and nuance, highlight lighter roasts.
- French press: full body, forgiving, great with medium to darker roasts.
- AeroPress: versatile, travel-friendly, can mimic espresso-like concentration or clean filter-style.
- Espresso machine: an investment; best once your roasting and grinding are consistent.
- Scales and kettles:
- A simple digital scale improves consistency dramatically.
- A gooseneck kettle offers better control for pour-over techniques.
Start where you are: a decent grinder and a simple brew method will let you actually taste the difference your roasting makes.
Brewing & Tasting: Bringing Your Roast to Life
Once your beans have rested, it’s time to evaluate your work in the cup.
1. A simple brewing baseline
For a clean, repeatable method, try:
- Pour-over (e.g., V60, Kalita)
- Coffee: 15–17 g
- Water: 250 g (ratio ~1:15–1:17)
- Water temp: 92–96°C (197–205°F)
- Brew time: 2:30–3:30 minutes
Adjust grind size to keep the brew within that time range. Too fast and sour? Grind finer. Too slow and bitter? Grind coarser.
2. How to taste your roast
When tasting, slow down and notice:
- Aroma – What do you smell when it’s freshly ground and as it brews? Chocolate? Citrus? Flowers? Nuts?
- Acidity – Not “sourness” but the brightness and liveliness. Is it soft like stone fruit or sharp like lemon?
- Body – The weight and texture on your tongue: light and tea-like, or heavy and syrupy?
- Sweetness – Does the coffee remind you of sugar, caramel, honey, ripe fruit, or is it flat?
- Finish – What flavors linger after you swallow?
Take brief notes: “Ethiopia, light-medium, pour-over: jasmine, lemon, honey, light body, bright but pleasant.” Over time, your notes will help you connect roast profiles with flavors in the cup.
3. Adjusting from here
If you don’t love the result:
- Too sour, harsh, or underdeveloped?
- Roast a bit longer next time (slightly deeper into or past first crack).
- Check brew: slightly finer grind and longer extraction can help balance.
- Too bitter, ashy, or flat?
- End the roast earlier; avoid drifting toward second crack.
- Consider a faster, more energetic early roast phase if using a controllable roaster.
- Check brew: coarser grind, shorter contact time.
Treat each roast as a data point, not a failure. Even “imperfect” coffee is usually drinkable and educational.
Matching Roast Levels to Brew Methods: Practical Pairings
Certain roast levels tend to complement particular brewing styles:
- Light roast
- Best with: pour-over, AeroPress, batch brewer with good temperature control.
- Why: emphasizes nuance, acidity, florals, and origin character.
- Medium roast
- Best with: almost everything—pour-over, drip, French press, AeroPress, some espresso.
- Why: offers balance and is forgiving, showcasing both sweetness and complexity.
- Medium-dark / Dark roast
- Best with: espresso (especially classic, chocolatey profiles), French press, moka pot.
- Why: richer body, lower acidity, more roast-driven flavors.
As you gain experience, you may break these “rules,” but they’re reliable starting points for enjoying your roasts at their best.
Conclusion
Home roasting is where coffee stops being just a drink and becomes a craft. You’ll burn a few batches, overshoot a roast, or underdevelop a delicate Ethiopian at some point—but each experiment teaches your senses something new. Over time, you’ll discover beans you adore, profiles that fit your taste, and brewing styles that let your roasts shine.
Give yourself permission to learn slowly. Start with one or two origins, a simple roasting setup, and a straightforward brew method. Keep notes, taste thoughtfully, and iterate. Long before your technique is perfect, you’ll be enjoying some of the freshest, most personal coffee you’ve ever had—made entirely by you, from green to great.
Sources
- [Specialty Coffee Association – Introduction to Coffee Roasting](https://sca.coffee/education) - Professional-level educational resources on coffee roasting fundamentals and standards.
- [National Coffee Association (NCA) – Coffee Roasting Basics](https://www.ncausa.org/About-Coffee/How-to-Brew-Coffee/Coffee-Roasts) - Overview of roast levels, flavor changes, and terminology.
- [Counter Culture Coffee – Brewing Guides](https://counterculturecoffee.com/learn/brewing-guides) - Practical brew recipes and techniques that help you evaluate and enjoy your home roasts.
- [Perfect Daily Grind – Beginner’s Guide to Roasting Coffee at Home](https://perfectdailygrind.com/2021/02/beginners-guide-to-roasting-coffee-at-home/) - Detailed discussion of home roasting methods, pros, cons, and safety considerations.
- [Home-Barista – Forums on Home Roasting](https://www.home-barista.com/home-roasting/) - Community discussions and real-world experiences on profiles, equipment, and troubleshooting for home roasters.
Key Takeaway
The most important thing to remember from this article is that this information can change how you think about Home Roasting.